
api-governance
How to structure your Minimal API in .NET?

Summarize with


In today's software architecture landscape, APIs (Application Programming Interfaces) have evolved into the vital connectors of applications, facilitating seamless communication, data sharing, and collaboration.
With the debut of .NET 6, Microsoft has not only introduced tools that boost productivity, performance, and flexibility but has also pioneered the concept of Minimal APIs, which revolutionizes how we create APIs by offering a streamlined and intuitive approach.
Uncover why API security debt is the hidden cost of modern APIs, download The Anatomy of an API: 2025 Edition for free.
By staying until the end, you'll gain insights into:
Now, let's delve into the realm of minimalism!
To follow along you will need the following:
For those who prefer a lighter setup, Visual Studio Code is a suitable alternative.
Minimal API is a streamlined approach to building REST APIs in .NET, focusing on brevity in code, minimal configuration, and a significant reduction in the usual formalities associated with traditional methods. With just three lines of code, you can bring an API to life!
var builder = WebApplication.CreateBuilder(args);

var app = builder.Build();

app.MapGet("/", () => "Hello World");

app.Run();
In a functional context, both approaches serve the purpose of creating REST APIs effectively. However, Minimal API shines in several aspects where it outperforms the controller-based approach:
However, it's essential not to dismiss controllers entirely because:
The best use cases for each approach depend on the specific requirements. Minimal API excels in simple CRUD apps or lightweight services like logging, whereas controllers shine in complex, enterprise-grade applications.
Treblle can enhance both Minimal API and controller-based approaches by streamlining the security and monitoring aspects of REST API development. For Minimal API setups, where simplicity and performance are key, Treblle integrates seamlessly, adding robust security checks and real-time threat assessments without burdening the lightweight architecture. This ensures your streamlined API remains efficient while being protected against vulnerabilities and attacks.
Need real-time insight into how your APIs are used and performing?
Treblle helps you monitor, debug, and optimize every API request.
Explore Treblle
Creating a Minimal API closely mirrors the traditional approach, so you should encounter no significant challenges. It is a straightforward procedure that can be accomplished in just a few easy steps.
Let's get started:
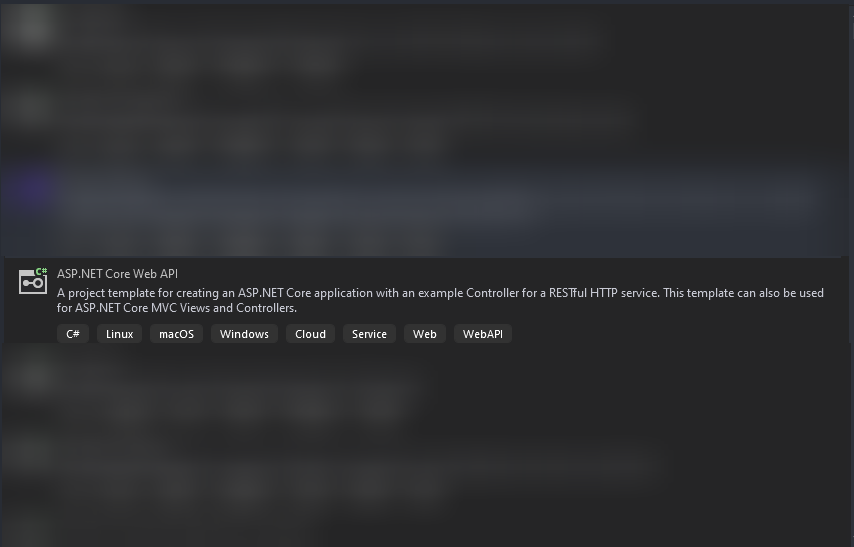
Web API template
2. Provide a preferred name for your project and select the location where you wish to store it
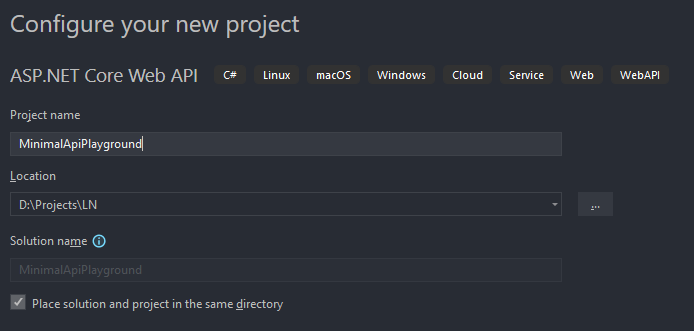
Providing project name
3. For the final step, choose the targeted framework (you can leave it as the latest version), ensure that the "Configure for HTTPS" and "Enable OpenAPI support" checkboxes are checked, and, most importantly, leave the checkbox "Use controllers (uncheck to use Minimal API)" unchecked. Then, click the "Create" button.
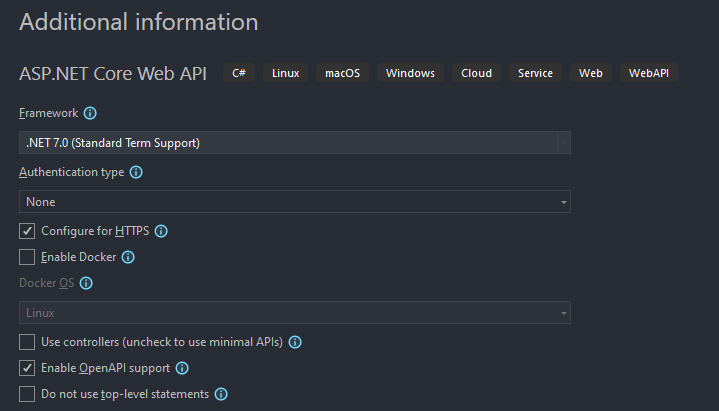
Chose framework, and API type
Let's modify the Program.cs file to resemble a basic CRUD application:
public static List<User> Users = new()
{
    new User()
    {
        Id = 1,
        FirstName = "Callie",
        LastName = "Hackforth",
        BirthDate = new DateOnly(1995, 10, 3)
    },
    new User()
    {
        Id = 2,
        FirstName = "Odell",
        LastName = "Blowes",
        BirthDate = new DateOnly(1984, 4, 7)
    },
    new User()
    {
        Id = 3,
        FirstName = "Callie",
        LastName = "Corrett",
        BirthDate = new DateOnly(1991, 3, 4)
    }
};

var builder = WebApplication.CreateBuilder(args);

builder.Services
       .AddEndpointsApiExplorer()
       .AddSwaggerGen();

var app = builder.Build();

app.UseHttpsRedirection();

app.MapGet("", () => Collections.Users);

app.MapGet("/{id}", (int id) => Collections.Users
                                           .FirstOrDefault(user => user.Id == id));

app.MapPost("", (User user) => Collections.Users.Add(user));

app.MapPut("/{id}", (int id, User user) =>
{
    User currentUser = Collections.Users
                                  .FirstOrDefault(user => user.Id == id);

    currentUser.FirstName = user.FirstName;
    currentUser.LastName = user.LastName;
    currentUser.BirthDate = user.BirthDate;
});

app.MapDelete("/{id}", (int id) =>
{
    var userForDeletion = Collections.Users
                                     .FirstOrDefault(user => user.Id == id);

    Collections.Users.Remove(userForDeletion);
});

app.Run();

public class User
{
    public int Id { get; init; }
    public string FirstName { get; set; }
    public string LastName { get; set; }
    public DateOnly BirthDate { get; set; }
}
As evident, everything resides within that single location, including registered services, endpoints, and even models. However, this approach remains acceptable only up to a certain point.
Consider this scenario: You decide to incorporate a repository pattern, followed by the introduction of background jobs, a handful of middleware, and an additional set of endpoints catering to various resources.
Ultimately, Program.cs can transform into a tangled mass of code, leading to issues such as:
However, two solutions can greatly enhance the cleanliness and maintainability of Minimal API:
I will provide a comprehensive discussion of these solutions and guide you through their implementation in your current project.
The first approach to achieving cleaner and more organized endpoints involves grouping them by feature.
In .NET 6, this could be accomplished using extension methods on the IEndpointRouteBuilder class. However, with the release of .NET 7, a new feature known as "Endpoint grouping" has been introduced. This feature enables you to apply constraints and rules to a collection of Minimal API endpoints simultaneously.
No more theory – let's streamline this API!
Before delving into endpoint modifications, let's tidy up the Program.cs file.
Create a directory named "Extensions" and within it, establish a static class named "Configuration.cs". This class will house two methods in this context:
public static class Configuration
{
    public static void RegisterServices(this WebApplicationBuilder builder)
    {
        builder.Services
               .AddEndpointsApiExplorer()
               .AddSwaggerGen();
    }

    public static void RegisterMiddlewares(this WebApplication app)
    {
        if (app.Environment.IsDevelopment())
        {
            app.UseSwagger()
               .UseSwaggerUI();
        }

        app.UseHttpsRedirection();
    }
}
The registration in Program.cs appears as follows:
var builder = WebApplication.CreateBuilder(args);

builder.RegisterServices();

var app = builder.Build();

app.RegisterMiddlewares();

app.Run();
For the sake of simplicity, as I am using an in-memory collection, I will also relocate the static collection to another folder and file.
Establish a "Data" folder comprising a static class named "Collections" and a static list titled "Users."
public static class Collections
{
    public static List<User> Users = new List<User>()
    {
        new User()
        {
            Id = 1,
            FirstName = "Callie",
            LastName = "Hackforth",
            BirthDate = new DateOnly(1995, 10, 3)
        },
        new User()
        {
            Id = 2,
            FirstName = "Odell",
            LastName = "Blowes",
            BirthDate = new DateOnly(1984, 4, 7)
        },
        new User()
        {
            Id = 3,
            FirstName = "Callie",
            LastName = "Corrett",
            BirthDate = new DateOnly(1991, 3, 4)
        },
        new User()
        {
            Id = 4,
            FirstName = "Channa",
            LastName = "McKeggie",
            BirthDate = new DateOnly(1985, 11, 13)
        },
        new User()
        {
            Id = 5,
            FirstName = "Angelita",
            LastName = "Jubert",
            BirthDate = new DateOnly(1990, 1, 9)
        }
    };
}
Within the same folder, include the "User" model
public class User
{
    public int Id { get; init; }
    public string FirstName { get; set; }
    public string LastName { get; set; }
    internal DateOnly BirthDate { get; set; }
}
The initial phase of cleanup is complete; now, let's address the endpoints:
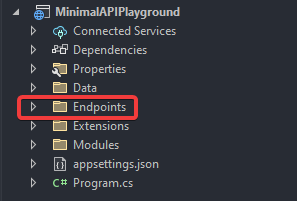
Endpoint folder for grouped endpoints
2. Inside the "Endpoints" folder, create a class with the corresponding name, which in our case will be "Users." This class must be static since we will be including an extension method that utilizes the endpoint grouping feature
public static class Users
{
    public static void RegisterUserEndpoints(this IEndpointRouteBuilder routes)
    {
        // Grouped endpoint will go here
    }
}
It's good practice to name methods by appending the feature name followed by "Endpoints" (e.g., UserEndpoints).
3. Include grouped endpoints within the previously added method
public static class Users
{
    public static void RegisterUserEndpoints(this IEndpointRouteBuilder routes)
    {
      var users = routes.MapGroup("/api/v1/users");

      users.MapGet("", () => Collections.Users);

      users.MapGet("/{id}", (int id) => Collections.Users
                                                   .FirstOrDefault(user => user.Id == id));

      users.MapPost("", (User user) => Collections.Users.Add(user));

      users.MapPut("/{id}", (int id, User user) =>
      {
        User currentUser = Collections.Users
                                      .FirstOrDefault(user => user.Id == id);

        currentUser.FirstName = user.FirstName;
        currentUser.LastName = user.LastName;
        currentUser.BirthDate = user.BirthDate;
     });

     users.MapDelete("/{id}", (int id) =>
     {
        var userForDeletion = Collections.Users
                                         .FirstOrDefault(user => user.Id == id);

        Collections.Users.Remove(userForDeletion);
     });
   }
}
The MapGroup method is applied to an IEndpointRouteBuilder variable, which contains all the application's routes. It accepts prefixes as its sole parameter. Consequently, all endpoints added to this group will have the specified prefixes prepended, along with any additional information provided.
To complete the refactoring process, simply register the method in Program.cs, similar to how you registered services and middlewares. That's all there is to it!
var builder = WebApplication.CreateBuilder(args);

builder.RegisterServices();

var app = builder.Build();

app.RegisterMiddlewares();

app.RegisterUserEndpoints(); // <-- Add this line
What are the advantages of this approach?
One drawback of this approach is that the codebase can expand significantly when numerous endpoint groups are involved.
However, if you prefer a more flexible approach and enjoy working with modules, then Carter is the choice for you.
As per the GitHub readme file:
**“**Carter is a framework that is a thin layer of extension methods and functionality over ASP.NET Core allowing the code to be more explicit and most importantly more enjoyable.”**
Essentially, it follows a similar approach to the first one, but with some additional features such as:
The setup can be completed in three straightforward steps:
 public static void RegisterServices(this WebApplicationBuilder builder)
 {
     builder.Services
            .AddEndpointsApiExplorer()
            .AddCarter() // <-- Add this line
            .AddSwaggerGen();
 }

 public static void RegisterMiddlewares(this WebApplication app)
 {
     if (app.Environment.IsDevelopment())
     {
         app.UseSwagger()
            .UseSwaggerUI();
     }

     app.MapCarter(); // <-- And this
 }
The AddCarter method handles the necessary services provided by Carter, while MapCarter scans for all endpoints that implement the ICarterModule interface and integrates them with the existing endpoints.
As mentioned earlier, Carter operates with modules, and all endpoints will be encapsulated within their respective modules.
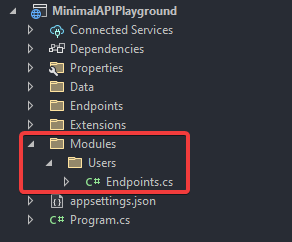
Carter folder structure
The Module class should inherit the ICarterModule interface, which exposes only one method (AddRoutes). However, it is advisable to inherit from the CarterModule class, which provides additional features.
public class Endpoints : CarterModule
{
    public override void AddRoutes(IEndpointRouteBuilder app)
    {
        app.MapGet("", () => Collections.Users);

        app.MapGet("/{id}", (int id) => Collections.Users
                                                   .FirstOrDefault(user => user.Id == id));

        app.MapPost("", (User user) => Collections.Users.Add(user));

        app.MapPut("/{id}", (int id, User user) =>
        {
            User currentUser = Collections.Users
                                          .FirstOrDefault(user => user.Id == id);

            currentUser.FirstName = user.FirstName;
            currentUser.LastName = user.LastName;
            currentUser.BirthDate = user.BirthDate;
        });

        app.MapDelete("/{id}", (int id) =>
        {
            var userForDeletion = Collections.Users
                                             .FirstOrDefault(user => user.Id == id);

            Collections.Users.Remove(userForDeletion);
        });
    }
}
Features from the base class are incorporated through the constructor within the module, and they pertain to the endpoints contained within it.
Some of these features encompass:
 public Endpoints() : base("api/v1/users")
 {
     this.RequireRateLimiting("fixedWindow")
         .WithCacheOutput("CacheOutput");
 }
Upon executing the application following the completion of the setup, you will achieve the same result as with the initial approach.
By employing this approach, you've addressed just one aspect of the puzzle. What about documenting your API, including all endpoints and their associated contracts? How about ensuring security and optimizing performance? There's a multitude of considerations for crafting a robust API.
Fortunately, the solution to your challenges lies in Treblle.
Treblle offers comprehensive coverage, spanning from observability to automated API documentation. The best part is that it seamlessly integrates with Minimal API.
In this article, we've explored how to structure your Minimal API in .NET, discussing two distinct approaches: endpoint grouping and the use of Carter. Regardless of your choice, it remains crucial to organize your Minimal API in a manner that promotes ease of comprehension and maintenance. By adhering to the guidance presented in this article, you can develop a Minimal API that is both efficient and effective.
I appreciate both approaches, and the choice often hinges on the specific requirements of the current project. For a straightforward and simplified approach, endpoint grouping proves to be a viable option. On the other hand, if flexibility and additional features are desired, Carter is an excellent selection.
Nevertheless, it's worth noting that Carter is a library built upon .NET features already present in the framework, so it's plausible that they will eventually find their way into Minimal APIs.
To conclude, I'd like to offer a few more tips for structuring your Minimal API:
See how your APIs are adopted and used with clean, actionable data.
Treblle gives you dashboards and insights built for APIs.
Explore Treblle
All Systems Operational
Gartner: Magic Quadrant, 2025
Gartner AI API Strategy, 2025
Everest Group: Enterprise App Integration Platforms, 2026


